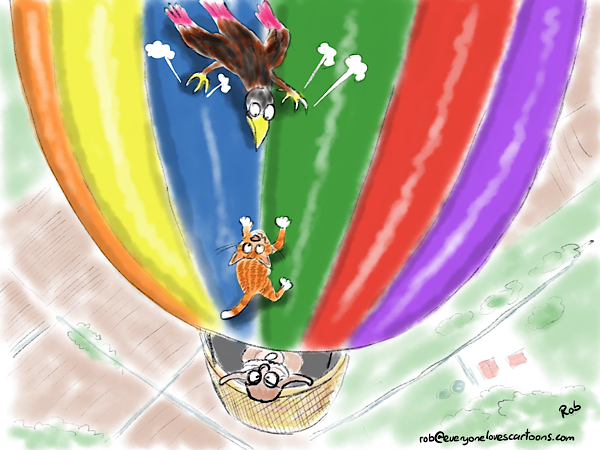
I’m going to run through the steps in drawing a hot air balloon cartoon, but first a littel background about the story featured in the cartoon.
The first-known sighting of the Pink-Tailed Eagle, was by amateur hot-air balloonist Herman Buoyant in 1897. While out for a flight with his cat Otto, a PinTailed Eagle alighted on the canopy of the balloon, puncturing it in several places with its talons. Otto was sent aloft in an attempt to dislodge the Eagle, but to no avail as the Eagle stayed put and the balloon began a slow descent due to the escaping air. With nothing left to no but wait, Buoyant began taking notes and sketches, and started compiling the first record of this until then unheard of raptor.
Upon crash landing Buoyant and Otto discovered that the eagle was not averse to scavenging for food, as it proceeded to raid and consume their picnic hamper they had brought for lunch.
Now let’s look at how I created this cartoon.
Initial sketch
Here is the initial sketch of how I imagined the cartoon would look. I used the 6b pencil in Procreate.
Sketching in the background
Using an aerial photo of some fields as a reference, I sketched in a simple background.
Adding the palette
To make it easier to keep the collation of the eagle consistent with other cartoons, I decided to use the same pallete from a previous cartoon, and then add additional colours as needed. I also pasted part of a previous eagle cartoon to use as a reference.
Starting the colouring
I’ve now now started the colouring, using the wash tool in Procreate to dab the colours on.
Doubling the colour layer.
To increase the intensity, I double the colour layer. I’ll often do this several times to build up the intensity to the required effect.
Making the pink stand out
To emphasise the pink feathers on the eagle, I added some black and purple on top of the brown.
Colouring the balloon
At first I thought about having the balloon a more uniform colour to serve as a background to make the characters stand out. However, I couldn’t resist having a more colourful balloon instead.
Colouring the balloonist and basket
I used just three colours at various opacities for the balloonist and basket.
Colouring the background
Simple washes of brown and green were used for the background. I’ve also no copied and pasted the balloon colour twice to make it a lot bolder.
Adding form to the balloon
I used the wash tool again with black set at 30% opacity to run along the edges of the balloon panels. I then used the medium airbrush tool to apply some white down the middle of each panel.
Adding a bolder outline to the characters
I doubled the initial outline layer a couple of times, and then added some black using the technical pen to add some more black.
The finished cartoon
Finally, I added some shadow under the characters, and some hatching to give a bit more form.
I really enjoyed drawing that one, it’s already becoming one of my favourites.
What’s Next?
I drew some of the above cartoon during Cartoon Hour.
What’s Cartoon Hour?
Basically, it’s an hour where everyone meets on Zoom and draws at the same time (me too!). Folks can choose what they want to draw, and if they’re stuck for ideas, then I’m happy to help with some suggestions.
At the end of the hour we show each other what we’ve drawn. I’ll be imparting a few cartooning tips as well.It’s a good way to get some cartooning done and also to share with fellow doodlers.If you’d like to receive more details on Cartoon Hour, simply add your name, best email address, and type “Yes!” In the subject below.


